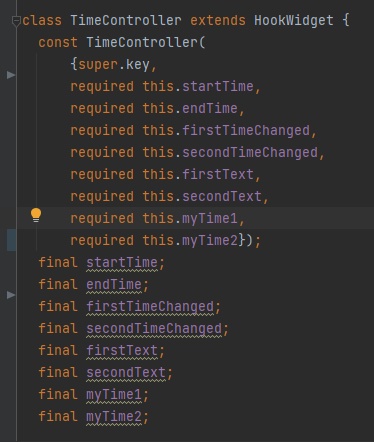
플루터로 만드는 앱이 자그마하다면 상태 관리의 필요성은 없다고 봐도 무방하다. 그런데 규모가 아주 조금이라도 커질 경우 문제가 생기는데, 예컨대 메인은 HomeScreen으로 연결하고, HomeScreen은 1로 연결, 1은 2로 연결, 2는 3으로 연결이라고 쳐보자. 그런데 3에서는 a라는 프로퍼티를 필요로 한다. a는 HomeScreen에 존재한다. 그럼 3에서 a를 받으려면 1과 2 또한 a를 required로 받아서 3에 있는 final a에 줘야 한다. 그것이 늘어나고 늘어나다보면 final, required 키워드가 한없이 늘어나게 되는 것이다.
그래서 우리는 생각했다… JavaScript가 똥인 건 알지만, 확장 라이브러리를 쓰고 더 많은 공부를 할 것이냐, 아니면 JS의 똥같은 프레임워크들로 돌아가느냐, 당연히 우리는 그 똥같은 프레임워크를 쓸 바에 라이브러리를 추가하는 방법을 택했다.
하여튼 위의 라이브러리들에는 GetX, Provider, Riverpod, Bloc, Hooks 등이 있고, 우리는 이걸 조금 불편하게나마 해결해주는 Inherited Widget에 대해 먼저 알아볼 것이다.
1
2
3
4
5
6
7
8
9
10
11
12
13
14
15
16
17
18
19
20
21
22
23
24
25
26
27
28
29
30
31
32
33
34
35
36
37
38
39
40
41
42
43
44
45
46
47
48
49
50
51
52
53
54
55
56
57
58
59
60
61
62
63
64
65
66
67
68
69
70
71
72
73
74
75
76
77
78
79
80
81
82
import 'package:flutter/material.dart';

void main() {
  runApp(MaterialApp(
      initialRoute: '/',
      routes: routes,
  ));
}

class MyInherited extends InheritedWidget {
  String name = "John Doe";
  int age = 0;

  MyInherited(child) : super(child: child);

  @override
  bool updateShouldNotify(covariant InheritedWidget oldWidget) => true;

  static MyInherited? of(BuildContext context) =>
      context.dependOnInheritedWidgetOfExactType();
}

class Home extends StatelessWidget {
  const Home({super.key});

  @override
  Widget build(BuildContext context) {
    return Scaffold(
          body: Center(
              child: ElevatedButton(
                  onPressed: () => Navigator.pushNamed(context, '/a'),
                  child: const Text("A로 이동"))));
  }
}

class A extends StatelessWidget {
  const A({super.key});

  @override
  Widget build(BuildContext context) {
    return Scaffold(
      body: Center(
        child: ElevatedButton(
            onPressed: () => Navigator.pushNamed(context, '/b'),
            child: const Text("B로 이동")),
      ),
    );
  }
}

class B extends StatelessWidget {
  const B({super.key});

  @override
  Widget build(BuildContext context) {
    return Scaffold(
      body: Center(
        child: ElevatedButton(
            onPressed: () => Navigator.pushNamed(context, '/c'),
            child: const Text("C로 이동")),
      ),
    );
  }
}

class C extends StatelessWidget {
  const C({super.key});

  @override
  Widget build(BuildContext context) {
    // 여기에서 정보를 보여준다.
    return Scaffold(body: Center(child: Text("$name, $age")));
  }
}

final Map<String, WidgetBuilder> routes = {
  '/': (context) => const Home(),
  '/a': (context) => const A(),
  '/b': (context) => const B(),
  '/c': (context) => const C(),
};
일단 기본적으로 이렇게 틀을 만들어준다. C에서 뭔가를 하려면 A와 B를 거쳐서 가야 한다. 즉, C에서 final name과 final age를 선언해주고 required로 전부 거쳐서 와야 한다. 상식적으로 이건 누가 봐도 비효율적임에 틀림이 없다.
1
2
3
4
5
6
7
8
9
10
11
12
class MyInherited extends InheritedWidget {
  String name = "John Doe";
  int age = 0;

  MyInherited(child) : super(child: child);

  @override
  bool updateShouldNotify(covariant InheritedWidget oldWidget) => true;

  static MyInherited? of(BuildContext context) =>
    context.dependOnInheritedWidgetOfExactType();
}
MyInherited를 선언하고, name과 age도 선언해준다. MyInherited(child) : super(child: child)는 이 위젯(클래스)의 하위 위젯들이 상태를 이용할 수 있게 해준다. bool updateShouldNotify는 이것이 재사용될 적에 하위 위젯을 다시 빌드해준다. false로 하면 하위 위젯들을 다시 빌드하지 않는다. context.dependOnInheritedWidgetOfExactType는 가장 가까운 위젯 계층을 반환해준다. 잠깐, 여기서 context의 정체와 of에 대해 짚고 넘어가야 하는데, context는 BuildContext context로, 우리가 빌드 함수를 쓸 때마다 매번 봤던 그것이다. 현재 계층의 위치를 말해준다. of는 우리가 있는 위젯에서 바로 윗층의 위젯을 추적하는 메소드다.
하여튼 이렇게 한 뒤에 마지막으로, 이것을 불러와야 한다. 방법은 간단하다. 우리가 C를 호출할 적에 C를 MyInherited로 감싸주면 된다.
1
'/c': (context) => MyInherited(const C()),
그리고 C에서도 name과 age를 정의해주고 표기해주자.
1
2
3
4
5
6
7
8
9
10
11
class C extends StatelessWidget {
  const C({super.key});

  @override
  Widget build(BuildContext context) {
    String name = MyInherited.of(context)!.name;
    int age = MyInherited.of(context)!.age;

    return Scaffold(body: Center(child: Text("$name, $age")));
  }
}
Inherited 위젯은 주의사항이 있다.
첫째는 복수의 Inherited를 상속받을 수 없다는 것이다. 쉽게 말해서 StringInherited class와 AgeInherited class가 있다면 둘 중 하나만 받을 수 있다는 이야기다. 그렇기에 우리는 String과 Age를 한 클래스에 묶어서 넣어야 한다. 패키징을 잘 해서 상태 관리에서 유용하게 쓰는 것이 답이다.
둘째는 하위 위젯으로 값을 넘길 적에 null값이 넘어가는 경우가 종종 있어 유념해야 한다. MyInherited.of(context)!.의 위치 파악을 제대로 하지 못하면 위젯마다 전부 Inherited(위젯()) 처리를 해야 한다.